Showing posts with label Useful tips. Show all posts

Thursday, August 2, 2018

Repaired a Bag with Discards

I like multi-functional bags and this is one I received as a gift.  


I have been using pouches since my handbag was snatched in 2005, so I like it that I can use it as a regular bag with its strap attached or as a pouch after taking the flaps out from its back pocket.  

I can no longer use it as a pouch, ever since the clasps attached to the flaps were damaged.


So, I decided to repair it after figuring out what discards I can use to fix it. 

Can you guess what this discarded material is?  I used it to wave in the belt and give the bag support since the flaps can no longer be used.


It is a cut out from a shampoo bottle!


So, the material I needed to repair it was a black shampoo bottle and a long woven belt which makes adjusting the length to hang the pouch on the hip easy.


When measurements are required in my craft work, I usually use paper with grids on it as a guide.  So, the other discard I used was a page from my children's exercise book for writing in Mandarin. 


I folded the sides of the paper up so that it fits the size I need to make backing for my bag.  This is the template for the bag.


I folded the template in half and half again. 


Then I opened it up to mark as shown, areas to cut out for inserting the belt.  The dotted lines on the templates represent the folds I made.  In doing that I am able to centralize the cut outs for the belt.


I placed the template on shampoo bottle once I have cut open one of its sides.  Marked it accordingly with a sharp pen. I decided to cut the width wider than the woven belt I am using so that a broader width belt can also be inserted.   

This is how the backing should look like after the belt has been inserted.


I cut curved edges off the corners of the plastic sheet to prevent the sharp edges from damaging the fabric.


As the plastic backing is wider than the openings of the pocket, I had to fold the plastic in half before I can insert it.


Remember to position the clasp of the belt in the right direction so that you can buckle it.


As you can see, the bag does not slouch over with the plastic backing inserted.


I like the pouch even better now as I can use it without the flap or belt showing.


Thursday, January 28, 2016

How do you store your crafting tools and materials?

I often come across this question from other crafters, "How do you store your crafting tools and materials?"

I used lots of bead in my jewellery making hobby, so I use a rotating spice rack that comes with bottles to store my beads and head pins.  I like it that the bottle is clear so that I can see what is stored in it. It is neat and does not take up too much space on my working table.


The beads I bought came in small plastic screw top jar like this that I can slip into my spice bottles.


I keep my crafting tools in tool box with trays like this.


Here are some other condiment caddies meant for your kitchen that you can consider using.

This is a coffee storage carousel for K-Cup Pods to consider using if you already have bottles like the ones above for spice, large enough to slot them in.  There are also models available that can rotate.


This is meant for storing what you need for making coffee.  I use knitting needles and rods to roll my wires, so, I could use the space for storing cups to keep them.  I will have to put a container inside the slot to hold them neatly together.


I think it is good to be able to see what you use in your projects.  You would not want to be caught in a bout of inspiration to discover that you are short of the material you need to complete your work.

Here is another see through example that I like.  Since there is a cover, I will be able to carry it around with me.  I like it that the space meant for storing ice can be used to hold my tools.  The five containers are removable.  So, if I buy more than a unit, I should be able to interchange containers of beads that I need for my current project.


How do you store your craft tools and materials?

The products that I share here can be purchased from Amazon.


Tuesday, June 10, 2008

Table Chic from Trash

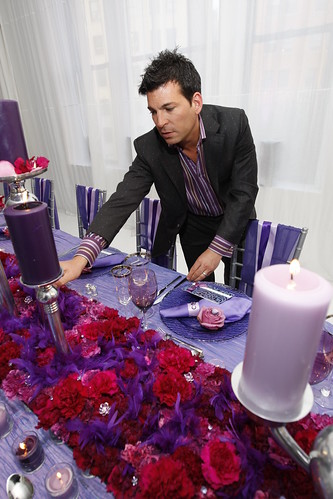
I have been watching David Tutera on Party Planner and...


...he has inspired me to create a flora centre piece for dining table.


All you need to salvage from your bin are:

1) 4 Plastic Bags in one or two colours to from stamens
2) 4 Plastic Bags in a larger size to from petals of flower
3) 2 Plastic Bags in smaller size in 2 different shades of colour
4) 7 small batteries to to add weight to piece
5) 2 rubber bands

Equipment Needed
1) Scissors

Here is the instruction.


Like it? Then make many of them in different shades to decorate your dinning table.

I have been inspired by David. Have I inspired you?

Tuesday, September 25, 2007

Hidden lesson? Discovered in 3Rs!

I was asked if I will be talking about the basics of 3Rs, that is, "Reduce, Re-Use and Recycle", when I teach the children how to create lanterns out of egg cartons.

It then dawned on me that the lanterns will not be used just to enlighten their forthcoming mid-autumn festive night walk-about. As I teach them to create, I will take this opportunity to impress upon them that I enjoy working with my imagination to "create something out of nothing". To be able to do the same, all they have to do is develop a habit of looking at the things they have around them with 3Rs in mind and with the knowledge they have already acquired, see how they could make use of them.

With this impressed upon their young minds, I hope that when they start blaming their parents or others for the things they lack, they will remember this lantern making lesson and figure out other ways to attain what they want.

So, did they create anything usable? See for yourself.


A very handy piece for decorating lanterns?


Want to see more pictures? Check out the comments posted on the blog of one of the mothers who have participated with her children.

Look out for my free tutorials in the next posting.

Saturday, June 30, 2007

So you can create. What now?

Toyota has started their Tom-Tom Club. I have read and heard that this recreation is thriving at community centers, in churches and public parks. Even music therapist, Christine Stevens, said that it makes people feel more alive and productive and has started her own "Health Rhythms for Remo Drums" wellness centre.

Yes, it is a drum circle we were discussing about starting at our Sungai Long Buddhist Society today. So, should we fork out a sum to buy the necessary musical instruments? Maybe we should start a movement of sounds with our plastic material arty-fication creations to gauge how members of the community feels about the idea.

So, if you think you would like to join us for this no inhibitions, noisy team building fiasco, start creating your own musical instrument and write or call to find out when we will start this sound movement at a park in the neighbourhood of Sungai Long.

Yes, my children are all ready to stomp with you with...

...her flower drum dress

her colourful shaker

his shaker

Her maracas

His maracas

Scrapper

Tin pan drum

Wooden clappers

and Cymbals

Check out this list of musical instrument around the world if you need more ideas of what other musical instrument you can create.

For young people who find it difficult to socialize, drumming is a good way for you to let out the stress of meeting someone new and it will be very easy for you to discover the right mate. Just follow the one who keeps beating to your rhythm.

You can create music, but think you are not talented enough? Then the drumming circle is the best place for you to explore your inclination and build up your self esteem. You may soon realised that you do have the skills in this field when the novices start drumming to your beat.

Bring the real thing if you think recycled musical wares are not your style.